Journal of Recent Meetings or Annoucements
Club AGM
January was the club AGM, followed by a sharpening workshop. Alan Edwards brought 3 separate jigs, to show the different ways of sharpening a gouge on a bench grinder and members were encouraged to have a go and see which they liked best.

Steve Heeley
Steve Heeley returned in December to show how to create a lidded, stemmed form with a square edge. Steve hollowed out the centre with a spindle gouge, explaining the techniquie as he did so. When a dark colour is applied to a shape, there is nowhere to hide if the silhouette is not perfect, but Steve is a master at creating pleasing shapes and, once again, did not disappoint.
Steve Heely
For Novemeber's demonstration our very own Steve Heeley gave a demonstarion of the technique required to turn a winged bowl. Steve was careful to explain the dangers of turning a non-round item and walked the members through best practises required to avoid injury. The bowl itself was then coloured and decorated to create a truely outstandin piece.

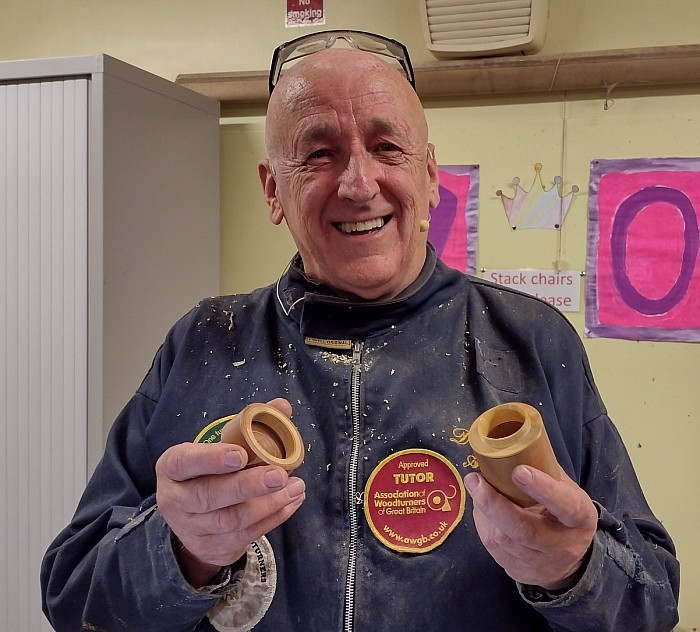
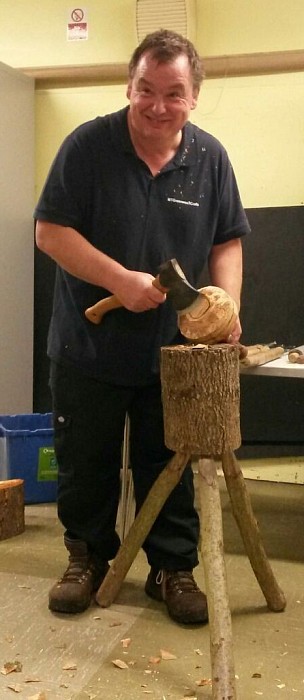
Alan Edwards
Wednesday 10th August saw a demonstration from our very own Alan Edwards. Alan has been a member of the club for about 4 years, but is also an active member of Worcestershire Wood turners and has brought with him a lot of experience - including from his time as a toolmaker. Alan completed 2 projects, during the demonstration: The first was a toothpick holder, made from laminated woods (see image). The second was a small pendant, made using paper joints. For both projects, Alan took us through the steps, explaining the process as he went. Finally, Alan explained the chucking method he had used to create the small project with which he (rather fittingly) won this month's Chairman's Challenge.
Keith Fenton
July's visitor to Cannock Chase Woodturners was Keith Fenton. Keith is a turner with over 30 year's experience and a wealth of knowledge. At the start of the demonstration, he handed out a thick catalogue, showing samples of his work, and members really enjoyed seeing what can be achieved. The demonstration itself was split into 2 projects: For the first part Keith turned a traditional scoop, showing the steps and working through the process, using a (rather tough) piece of ash. The second project was a ladle and Keith was able to show off the jig he uses for off centre turning to shape the inside. Keith was careful to explain the steps and possible pitfalls that can trap the unwary (the main one being the wood twisting in the jig).
David Atkinson - 8 June 2022
David Atkinson
At June's meeting we had the pleasure of welcoming David Atkinson to the club for the first time.
Dave took us through the process of making a box with a threaded lid. The process involved turning a piece of pear to the appropriate size and then using a piece of boxwood to create inserts for the lid and body of the box.
Dave listed a number of woods that would be suitable for threading (Boxwood, African Blackwood, Leadwood & Newtonia) and explained the process. He recommended a 20tpi (threads per inch) thread chaser for beginners because, somewhat counter intuitively, a courser thread can be more tricky to cut: Dave explained that when he wishes to cut a 10tpi thread, he finds it necessary to drop the speed to down to below 300rpm - which is slower than many hobbyist's lathes will go.
Although this was a relatively "simple" box, Dave also took the time to explain the processes he would use to embellish his boxes (via contrasting woods inserted in the lid, etc) and gave some great insights into the process.
We looks forward to seeing Dave again.
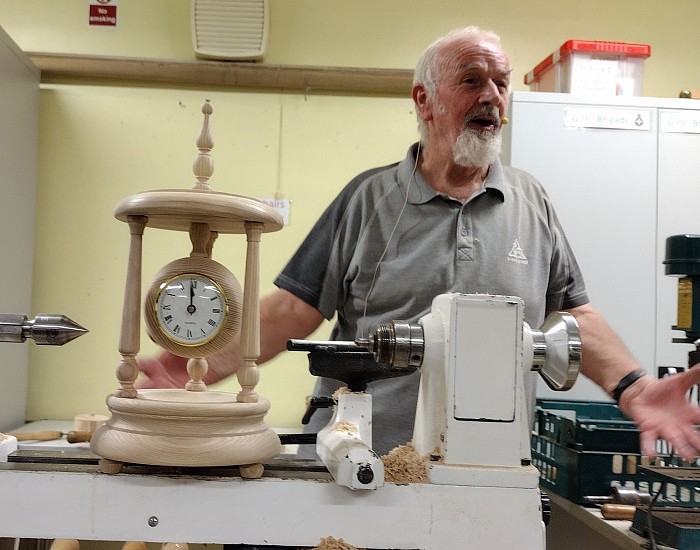
Ray Jones - 13 April 2022
Ray Jones
This month, our demonstrator was Ray Jones, showing off 65 years of woodturning experience to make a fantastic pedestal clock from ash in a little under two and a half hours.
In this one project, Ray was able to show off faceplate turning, spindle turning and turning a sphere (freehand!).
As always, Ray had some great tales to tell, but along with his amusing stories were some great tips for people trying to produce repeatable patterns (as shown by the 3 columns in the clock).
Ray started the demonstration with one column already turned, one part turned and one untouched blank. He showed off his "battlements" technique and explained how this is his way of ensuring repeatability, whether he's making 2, 3 or 50 items that need to match.
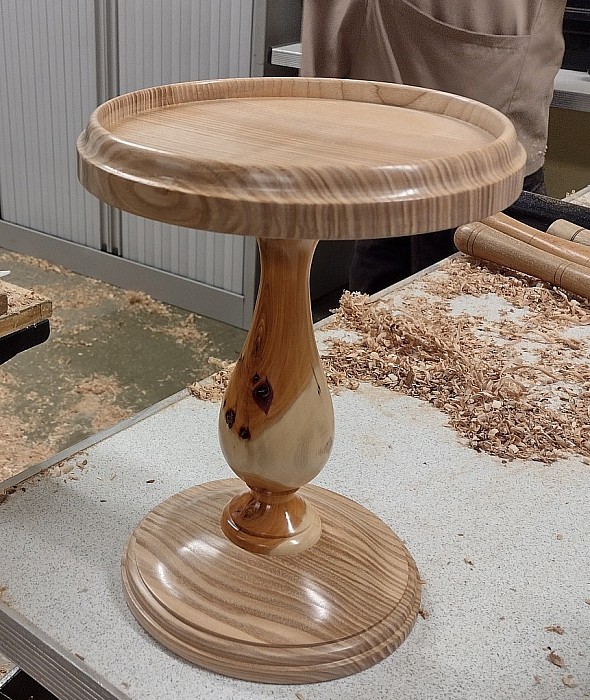
Steve Heeley - Plant Stand
Steve Heeley
At short notice Steve Heeley stepped in and gave us another excellent display of woodturning skill and experience.
As most turners will see, the base and top are ash (from the same original piece) and the stem is yew.
Top tip from Steve. If the joints are to be glued then the tenan should not be a tight fit. Leave space for the glue. Steve also cut grooves in the two tenans.
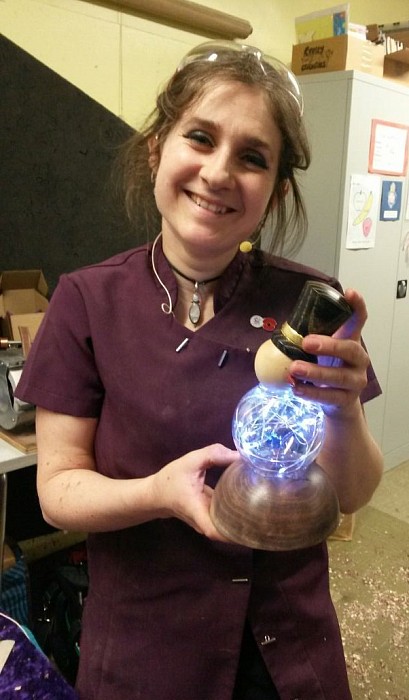
Emma with Illuminated Snow Man
Emma Cook (the Tiny Turner)
Emma's project for this demonstration was a snow man with glass ball body full of LED lights.
Here are a few key points from the demo:-
- Roughing a bowl blank between centres rather than on a screw chuck allows the selection of top and bottom (in this case of snowmans base) to be delayed until the true grain is exposed.
- Emma sanded with 180 then 240 and followed that with a cut and polish wax. Saves a lot of dust. This was followed with microcrystaline stick wax. Advantage of the stick wax is that it can be buffed straight away.
- For fixing glass to wood try Evostick Serious Glue or cheaper options include 151 Fantastic Elastic (pound shop) or the one used in the demo, Sudal Fixall. Adhesive must remain flexible to protect glass.
- Applying metal leaf. Choose size according to drying time. Drying time must give sufficient time to complete apoplication of leaf. Emma used 15 minute size (Polyvine) and advised leaving 24 hrs after applying leaf before brushing off excess leaf.
- Snowmans hat fixed with hot melt glue.
Chris Pouncy
Chris Pouncy (Robert Sorby Tools)
Chris did a great job not only of promoting the virtues of some of the Robert Sorby range of tools but of demonstrating in simple clear terms how to use some of the tools to the best effect.
Here are some of the key points:-
- Pro Edge with its many accessories gives a consistent finish and compared with many grinding systems removes minimal metal from tool with each sharpening.
- 120 belt on Pro Edge is good for most woodturning tools as any finer grit leaves cutting edge to weak.
- When cutting tennon on bowl blank keep depth of tennon small. Deeper tennon is weaker as there is greater chance of tennon (or part of) shearing off.
- Titanium Nitrate coating extende life of cutting edge. Although it is only a coating, after sharpening the TN is still intact at the cutting edge (in the flute).
- After using texturing tool(s) use a point tool to give demarkation between different textures.
- An oil finish on textured areas will pick up the texture.
- Tear drop head on RS200 can be used to good effect on outside of bowl.
- With flat side of RS200 on the rest the hollowing head can remove material from inside of bowl very efficiently.
- Spiralling tool works to best effect on straight grained wood such as box wood. Need to work at low speed.
- When rolling a bead make space to roll into before attempting to roll the bead.
Chris gave us too many tips to cover here, gave a good show with lots of laughs and sold us lots of Robert Sorby tools.
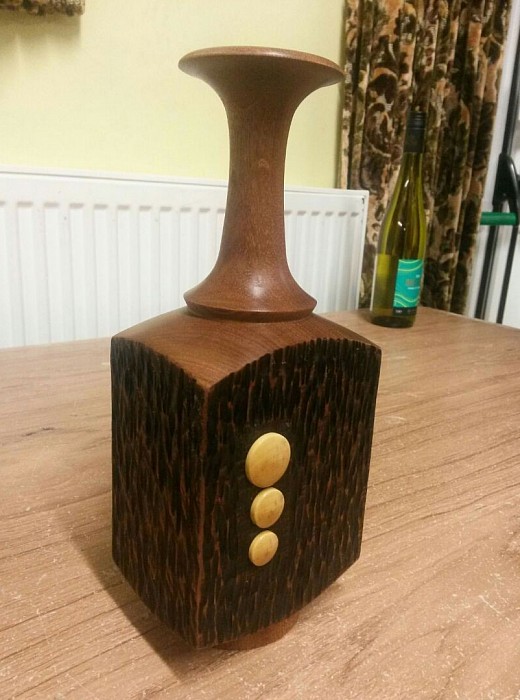
Weed Pot by Steve Heeley
Steve Heeley
Steve had prepared the blank by drilling on end and drilling three small holes in the side to receive the three buttons.
Steve says any wood will work for this design. The wood used here was sapele for the body and box wood for the buttons.
The excellence of Steve's turning and indeed the sharpness of his tools shows to good effect on the shoulders of this piece. It was also when sanding the shoulders that particular care was taken due to the hit and miss of working on round to square (rectangular) sections.
To get the effect on the rectangular body section Steve used a powerd cutting tool though clearly one could experiment wth different methods to etch the surface. This was followed with black acrylic which when dry was sanded back.
As you would expect from Mr Heeley the peice was then reverse chucked on a jam chuck to allow the base to be finished.
Mike Taylor
Mike gave us a great demonstration of hios pole lathe work.
The wood used in the demonstration was Alder cut from Mike's own woodland.
Only a few different tools were used. These were hook tools specially made for pole lathe work and not at all like the tools most woodturners are familiar with.
Cold presses linseed oil was one of the finishes recommended by Mike.
The chareter of pole lathe work is quite different to what many of us work towards, the nature of the wood and the effects of seesoning after turning being allowed to show through.
Also notable how muich physical hardwork there is in pole lathe work.
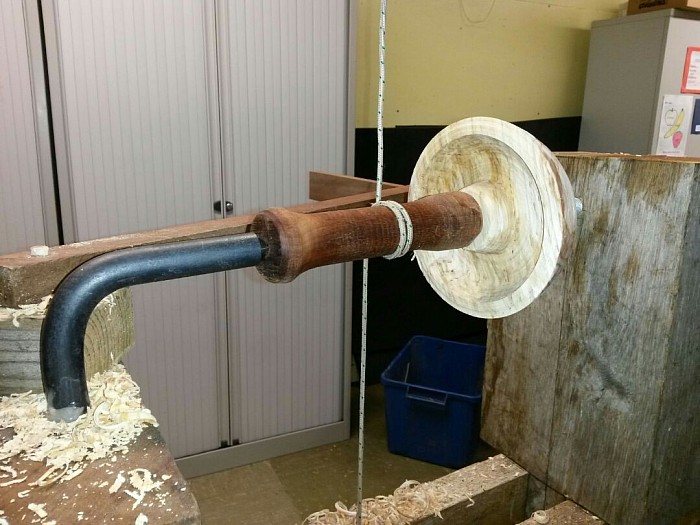
Poll Lathe Set-Up
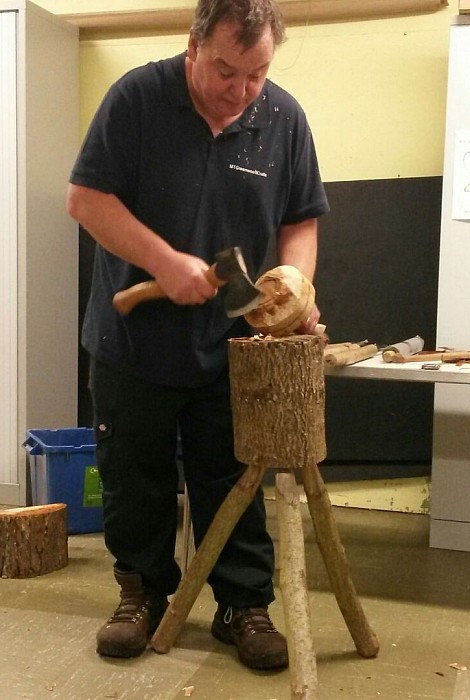
Preparing a Blank
Mike Taylor Happy at Work
Rick Dobney
The pictures below are a better description of the project than I can put in words. A stained pot with aluminium finial is the best I can do.
Please click here to see the text of the email Rick has kindly sent us detailing much of the information we would need to have a go.
A few points noted during Ricks demonstration:-
- You may want to use seperate tools for working aluminium.
- Spindle gouge and parting tool work well for shaping finial but keep dipping cutting edge in cutting compound (details in Ricks email).
- Cut tenon on finial to exact size of the drill to be used for creating the mortice.
- Don't mix abraisive used on aluminium with that to be used on wood.
- Disposable surgical gloves are ideal when "sanding" and polishing aluminium. As such gloves tear very easily they will not snag on moving parts.
- Polish aluminium with chrome polish.
- As aluminium has no grain one can cut "up hill" as well as "down hill".
- As aluminium shavings gather around the work DON'T be tempted to pull them away with your fingers. They can by razor sharp.
